SOP d for DeWalt DCW 604 P1 Battery Combi-Moulder (Router)
1. Purpose
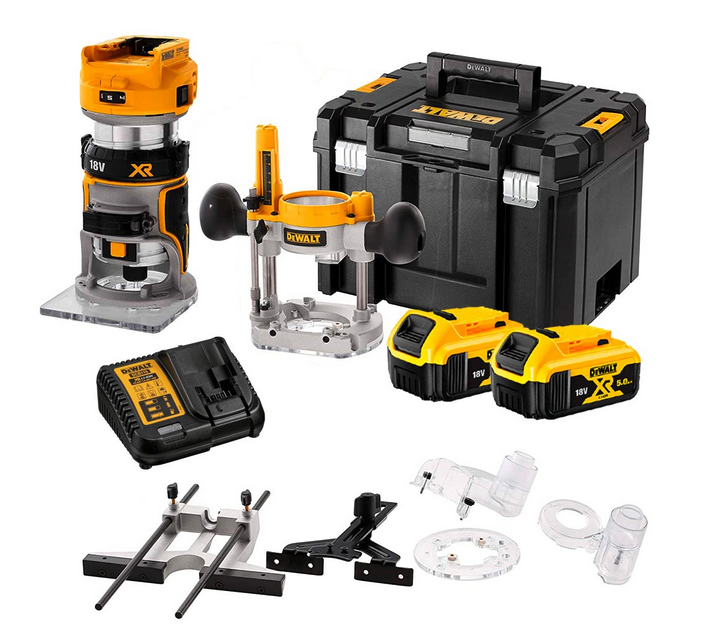
To ensure the safe, efficient, and proper use and maintenance of the DeWalt DCW 604 P1 battery-powered combi-router for professional medium-duty routing and edge milling.
2. Scope
Applicable to operators using the DeWalt router and related accessories.
3. Safety Precautions
- Wear appropriate PPE: safety glasses, ear protection, and dust mask.
- Avoid loose clothing and secure long hair to prevent entanglement.
- Never operate the router under wet or damp conditions or near flammable liquids.
- Use only DeWalt 18V XR batteries compatible with the tool.
- Disconnect the battery before changing bits or making adjustments.
- Keep hands clear of the rotating bit.
- Ensure the workpiece is securely clamped and stable before routing.
- Do not modify the tool or accessories.
- Handle router bits carefully; they are sharp and can cause injury.
4. Pre-Operation Checks
- Inspect the router, battery, and charger for damage.
- Verify the battery is charged.
- Select the correct router bit (6–8 mm shank) suitable for the material.
- Check that the collet and spindle are clean and free of debris.
- Ensure the router’s base (plunge or fixed) is properly assembled and locked.
5. Assembly and Bit Installation
- Attach the guide parallel rods or other accessories as needed, tightening securely.
- Remove the battery pack.
- Remove the motor unit from the base if needed.
- Insert the router bit into the loosened collet fully, then pull it back approximately 1.6 mm.
- Press the spindle lock button to lock the spindle.
- Tighten the collet nut clockwise using the wrench until bit is secure (manual ratchet method can be used for tighter fixing).
- Reinstall the motor unit into the base, ensuring alignment with guide pins and locking it securely with the locking lever.
- Insert the battery pack until it clicks into place.
6. Setting Depth and Speed
- Use the depth adjustment ring or plunge depth controls to set the cutting depth.
- Adjust the turret stop to limit plunge depth travel if needed.
- Set the appropriate variable speed (16,000 to 25,000 RPM) depending on the material.
7. Operation
- Ensure the work area is clear of obstacles.
- Hold the router firmly with both hands (on side handles for plunge mode; one hand on battery, one around fixed base for fixed mode).
- Turn the tool on using the dust-protected on/off switch.
- For plunge routing: depress the plunge lock lever, lower the bit to the desired depth, then release the lever to lock.
- Feed the router against the direction of bit rotation.
- Apply steady pressure; do not force the tool.
- Allow the router bit to come to a complete stop before setting the tool down.
- Use the dust extraction port with a compatible vacuum to maintain clear visibility and cleanliness.
8. Post-Operation
- Turn off the router and wait for the bit to stop spinning completely.
- Remove the battery.
- Clean the router body and vents from dust using a brush or compressed air.
- Inspect the router bit for wear; replace if necessary.
- Store the router and batteries in designated storage container and cabinet.
9. Maintenance
- Regularly check that screws and lock levers are tight.
- Clean air vents to avoid overheating.
- Do not open or service the motor or battery pack yourself; use authorized service centers.